Tuesday, August 30, 2022

Technique - Inserting an Exposed Zipper into a Cardigan

 This technique is courtesy of Fruity Knitting.

Complete the front bands and block the cardigan. Choose a zipper that is 1/2cm shorter than the cardigan. 

Technique:

  1. Butt the front bands together and stab with lots of pins into a grid board to keep straight. Make sure any ribbing lines up
  2. Pin one side of the opened zipper in place with the teeth extending from band edge. Baste in place
  3. Pin and baste the other side of the (closed) zipper in place
  4. Check that the zipper works and that the bands lie flat and in position
  5. Sttich in place using hand stitching in regular thread one stitch in from the edge of the band OR sew with a machine for strength


Technique - Knitting Backwards

This technique is courtesy of Meg Swansen, daughter of Elizabeth Zimmerman. It saves having to turn your work when knitting back and forth. Some of these situations are:

- Short rows on the body of a sweater; especially on the yoke, where turning involves the entire bulk of a bottom-up sweater.

- Bobbles on an Aran sweater

- The heel flap on socks.

- Cables

- w Entrelac

Technique for Knitting Backwards:

  1. Insert L needle into the back leg of first stitch on R needle, coming into the stitch from the front
  2. Wrap yarn around L needle, anti-clockwise
  3. Lift stitch over and off
Technique for Purling Backwards:
  1. Bring the yarn to the front
  2. Insert L needle into the back leg of the first stitch on the R needle,  coming into the stitch from the back
  3. Wrap yarn around L needle, anti-clockwise
  4. Lift stitch over and off


Monday, August 29, 2022

Tip - Purl When You Can

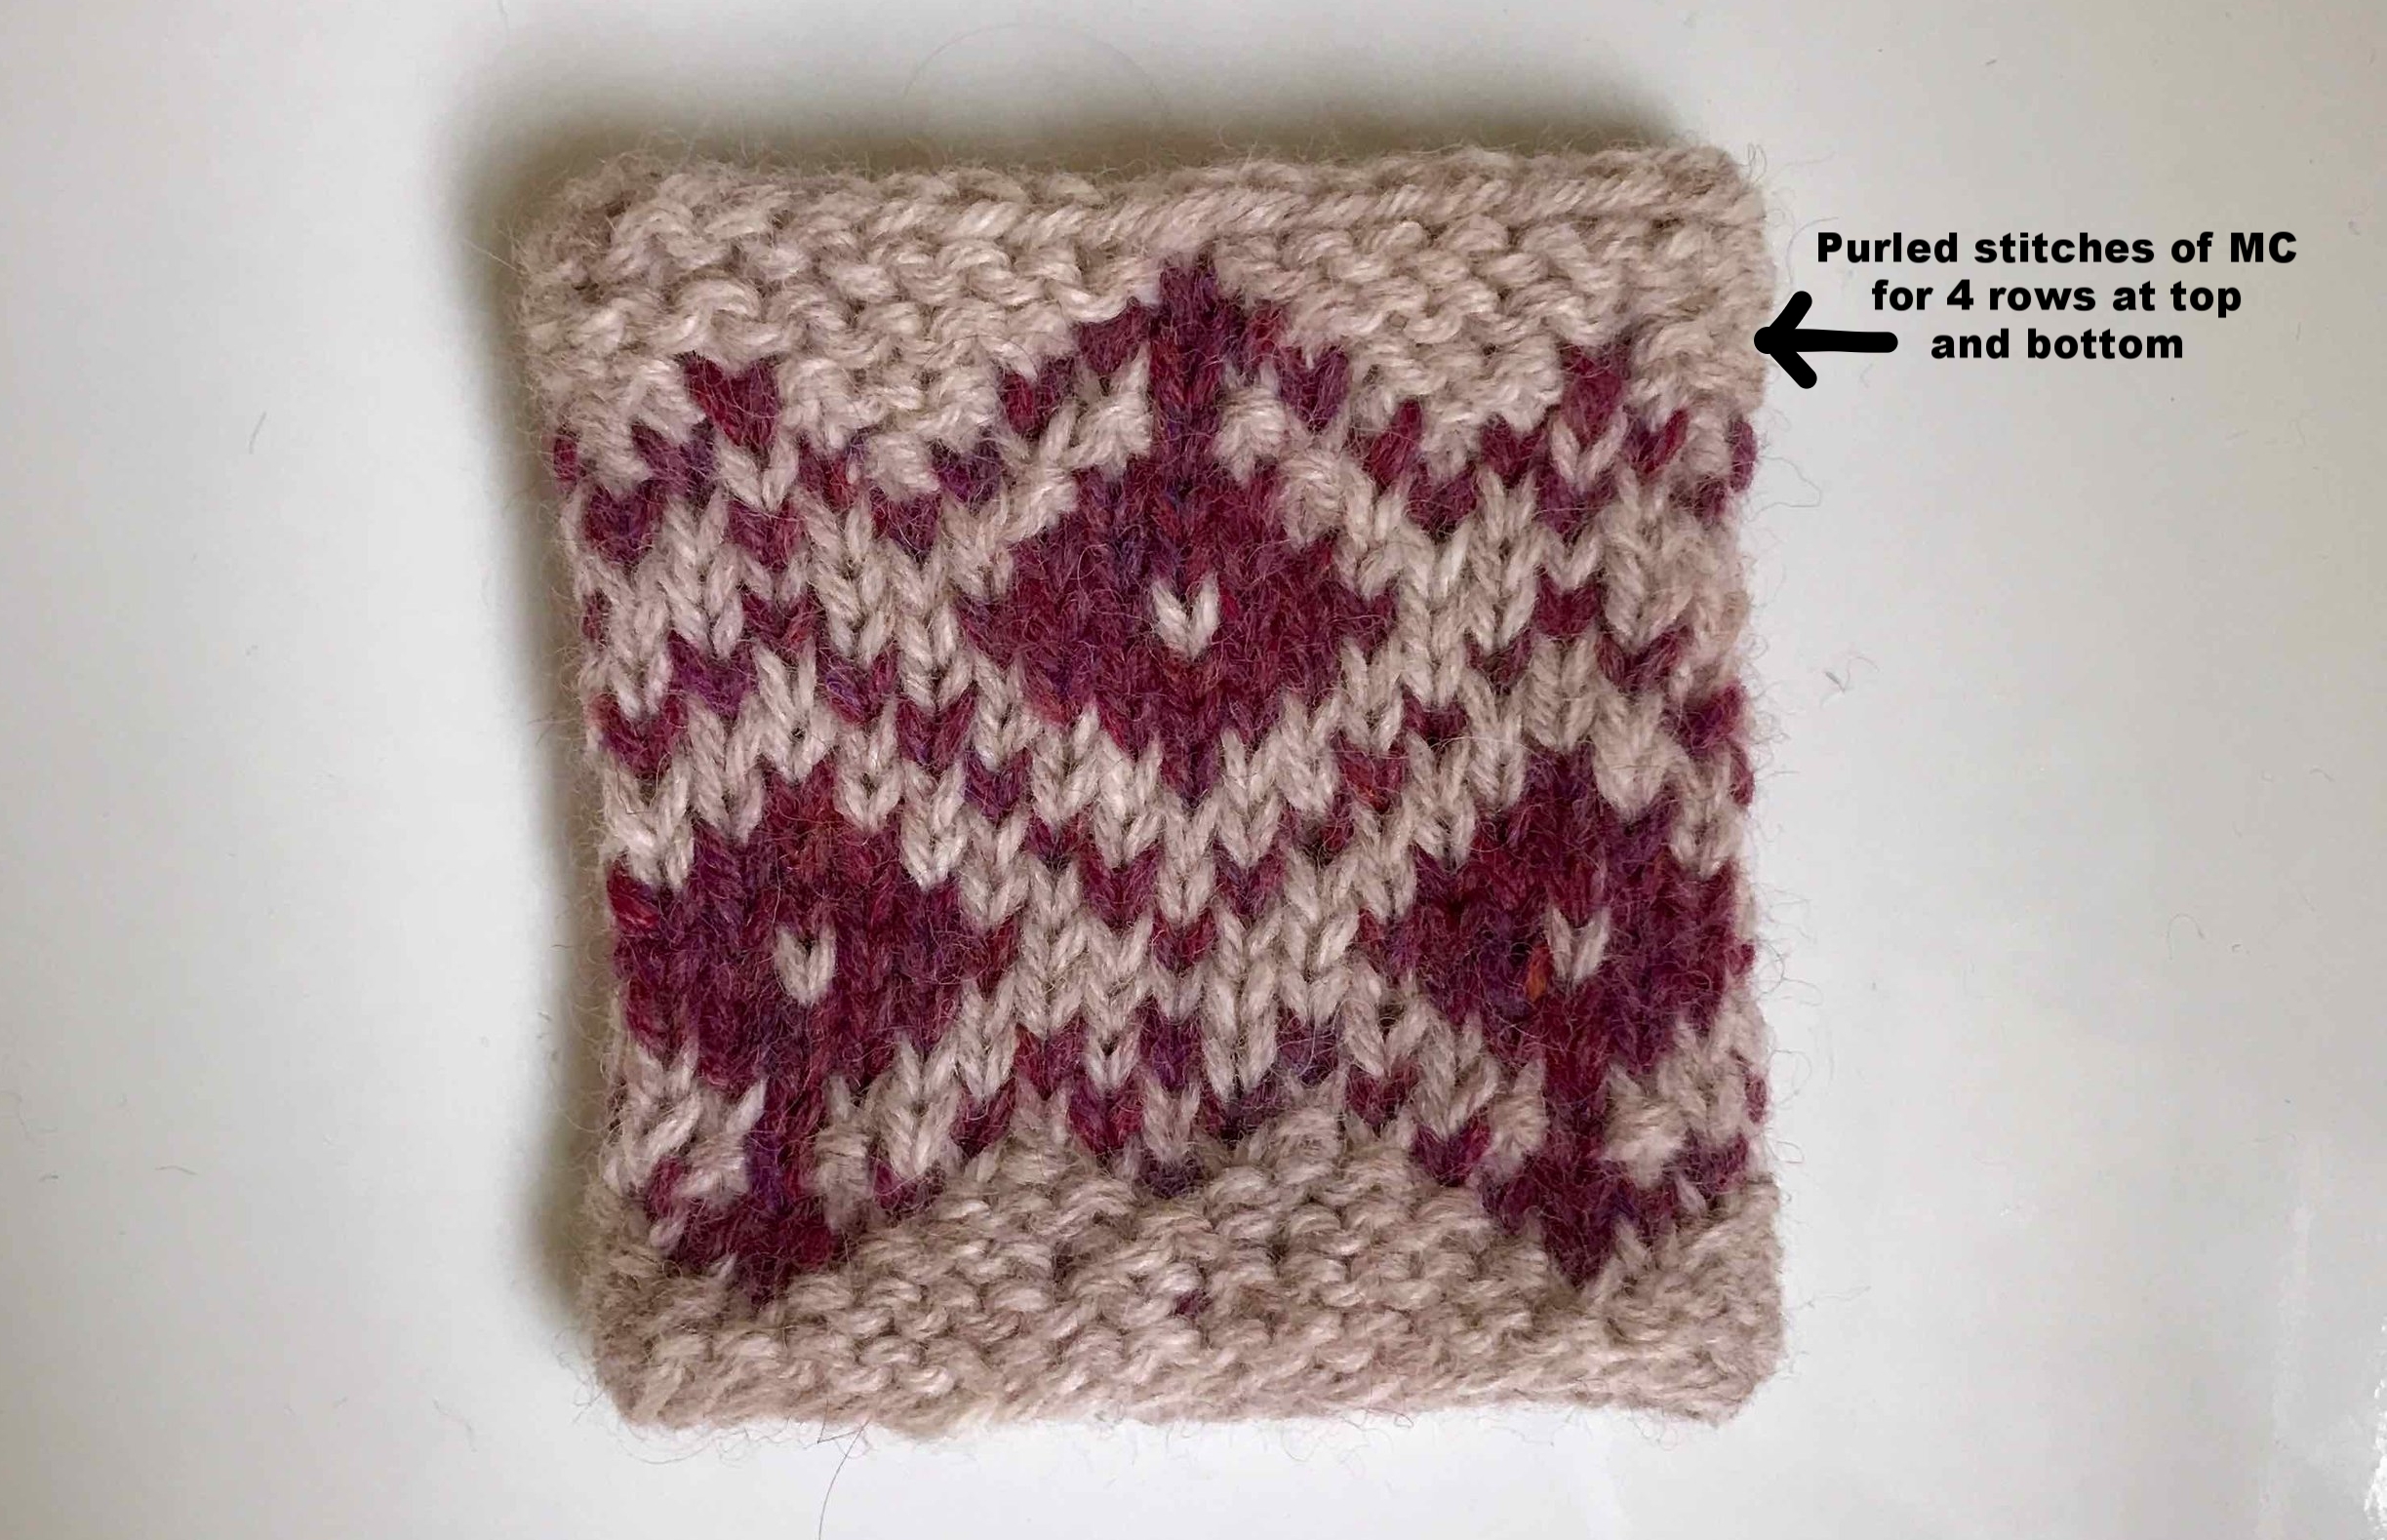
This tip is courtesy of Meg Swansen, daughter of Elizabeth Zimmerman. It is used when you don't want a cuff but you want the colour work to go right to the edge.

Purl When You Can (PWYC) is a technique to work stranded colourwork from the cast on edge without having to make a cuff. When working in stocking stitch, a cuff is normally added to the top and bottom edges to ensure the edges do not curl when finished. 

Meg Swansen introduced this technique and it is very useful for when you want the colourwork pattern to reach the edges of the knitting. I have used it in my Caffeic pattern and in the Neck and Neck! MKAL pattern.

The basic technique involves when working into as stitch of the same colour, purl it instead of knitting. If working into a contrasting colour stitch then knit it as usual. This only needs to be done in the first (or last) four or five rounds. The purl stitches act like ribbing does to prevent curling, but in a much less regular pattern than ribbing.


IMG_7928.jpg


Tip - Avoid a Jog in Colourwork when Knitting in the Round

 This tip is courtesy of Meg Swansen, Elizabeth Zimmerman's daughter.

On a single round of color (say, when alternating single rounds of 2 colors) - when you finish one round and are starting the next round in the 2nd color, make sure to bring the new color strand over the old color (instead of under it) when knitting the first stitch.

When alternating stripes that are 2, 3, or more rounds thick: Knit the first round of the new color in its entirety, and when you go to knit the first stitch of the next round, pick up the stitch of the row below (which is in the old color), put it on the left needle, and k2tog. Now knit on in the new color. The first stitch of the round is now moved one stitch to the left (if you are marking the first stitch, move your marker one to the left).

Saturday, August 20, 2022

Technique - Ladderback Jacquard

Catching floats using the Fair Isle method (wrapping the working yarn with the float) can sometimes show through, esp where the colours are highly contrasting.

Ladderback jacquard is used to manage long floats invisibly. You can choose to not use it when the floats are smaller and then use it when they're longer, just stop and start as many ladders as you need. Use ladderback jacquard every every 5 or 6 stitches. It can be used to work intarsia in the round. 

A ladder can be added at the beginning of the colourwork or part way through; mark them with a stitch marker if desired.

Ladderback jacquard involves increasing a stitch using the carried yarn = the first stitch of the ladder, and then purling that stitch in the carried yarn on subsequent rounds. This live ladder stitch will show on the right side of the work until it is no longer needed when it is simply knit together with the next stitch using the working yarn. The ladder stitch will fall to the back of the work.   

Add the first ladder stitch using a lifted increase (with the right needle point lift the right leg of the stitch below on the left needle and place it on the left needle). It is very important that the working yarn is brought to the front of the work before increasing. This prevents the ladder from showing through to the right side of the work.

As with all floats, the work should be loose.

Technique:

  1. At the stitch where you will add the ladder, bring both the working yarn the and carried yarn to the front of the work then do a lifted increase.
  2. Knit through the right leg of the lifted stitch with the carried yarn then move both yarns to the back and continue knitting
  3. On subsequent rounds, purl the ladder stitch with the carried yarn
  4. When you no longer want the ladder, knit the ladder stitch together with the next stitch in the working yarn

Technique - Add a Frill Edging

This frill can be added either at the end of knitting a sleeve (by increasing) or the beginning of a sleeve (by decreasing), and either flat or in the round.

Here, the example is at the end of knitting a sleeve, knit in the round. Use a needle that is a full size smaller than the one you've been knitting the sleeve with. Note that the depth of the frill can be adjusted by decreasing at a lower rate over more rows. Knit the frill quite tightly to stop it looking sloppy.

Technique:

  1.  In the next row, double the number of stitches eg 50 to 100 by increasing every second stitch
  2. In the next row, double the number of stitches eg 100 to 200 by increasing every second stitch
Here, the example is at the beginning of knitting a sleeve, knit in the round. 

Technique:

  1. Cast on 4 x the number of stitches that the first row of the sleeve requires. eg if the sleeve starts with 50 stitches, cast on 200.
  2. In the next row, decrease to half the number of stitches eg 200 to 100, by kniting 2 stitches then passing the first over the second. Knit a further 2 stitches then pass the first stitch over the second.
  3. In the next row, decrease to half the number of stitches again eg 100 to 50, by knitting two stitches together than the next two together, etc.

Friday, August 19, 2022

Adjusting Size or Style According to Gauge

Use the maths below to draw a schematic and then adjust this to get the size or style you want. eg a higher neckline.

 Stitch Gauge

Number of stitches per 10cm / 10 = stitches per cm

Row Gauge

Number of rows per 10cm /10 = rows per cm

Width of piece

Number of stitches /stitch gauge = width of piece

Length of piece

Number of rows / row gauge = length of piece

Number of Stitches

Width of piece x stitch gauge = number of stitches

Number of Rows

Length of piece x row gauge = number of rows


Technique: Adding a Button Band to a Cardigan

From Fruity Knitting, how to construct vertical buttonholes in a button band. Pick up stitches along the cardigan front and knit just less t...